RSS

Category Archives: Exterior

Getting Busy in the Backyard

As indicated in the kitchen design post, one of the changes we made midway through the design process was to increase the size of the range in the kitchen from 30″ to 36″. While the result shown below was a good thing:

. . . the unintended byproduct–an oversize steel carbuncle of a vent sprouting from the back of the house–was not:

Not only did the larger range size result in a larger vent, the vent placement created a conflict with the downspout, which was to run down the corner of the two houses. The plans called for a 4″-diameter, round downspout, but only 3″ of clearance remained after the big-ass vent elbowed its way onto the back of our house.

We couldn’t use a smaller diameter, round downspout due to the volume of runoff from the roof, so we were kinda screwed here. We could route a 4″ pipe down the corner, around the vent, and back down the corner, which would look ridiculous, or we could route the 4″ pipe straight down the side of our neighbor’s house far enough out to clear the vent, which would not only look ridiculous but also would likely not sit well with the neighbor.

As a result, we considered running the downspout on the other side of the house, down the new pillar to the right in the picture above, and directing runoff into a small planter area behind our outdoor couch. However, the GC was concerned that the city would reject this runoff rerouting and require us to reverse this. (Although living in Old Town is generally great, it does become mildly Orwellian at times like this, what with the Ministry of Arcane Permitting intruding into every aspect of a home renovation project . . .)

So, the GC’s exterior sub came up with a much better solution – a custom, rectangular, 3″ x 4″ downspout that would slot neatly between the corner and the vent and that would provide adequate capacity for the roof runoff. It worked beautifully:

The downspout also fit nicely to the west of the electrical meter:

You’ll note that the downspout terminates in a mass of conduit that we installed when the backyard was hardscaped in 2007:

One of the challenges we faced during the renovation was addressing these conduits and their functions, since they previously saw daylight in the small alcove between the two houses:

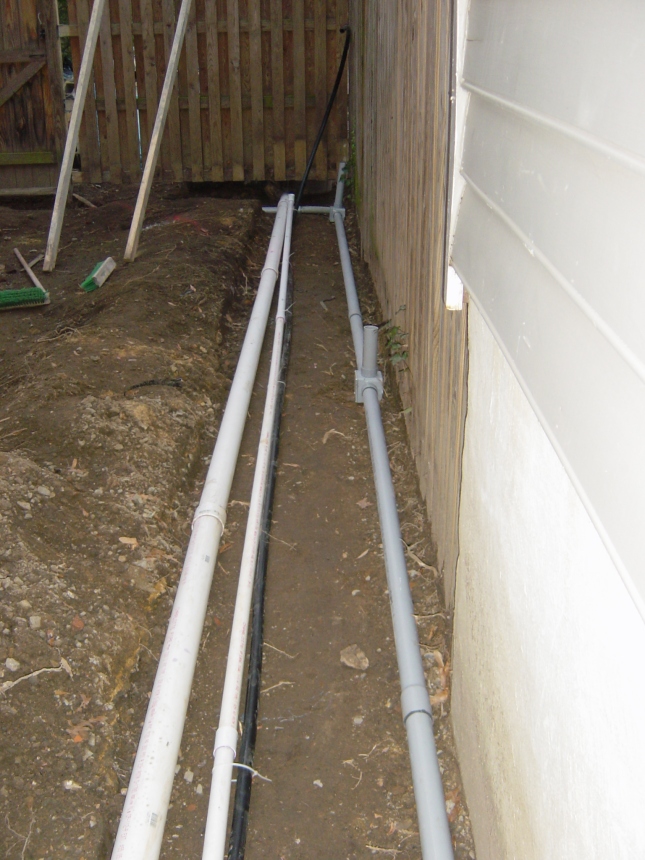
This little alcove previously was hidden from view. However, with the renovation, this alcove no longer exists, and we need to address routing and termination of the conduits and their contents. The conduits were exposed and cut down during the excavation stage of the project, as posted here. The exposed conduit functions include the following:

In addressing the issue, the guys approached the conduit the same way as with interior infrastructure elements – biggest first. The largest pipe was the drain line for the downspout, so this was angled west and connected.

The others were extended and routed so they would all snug up against the house to the west of the window (below a future exterior outlet and hose bib) and so they were tightly clustered together.

Because the black gas line conduit was being used to route cable to the outdoor TV, and because cable lines would enter and exit the house on the other side of the electrical panel, this was moved to the other side of its brethren before finalizing the arrangement and cement was poured.

Natalie’s hand-drawn plan for routing the pipes is in the foreground, marked up in red where we just changed the location of the outlet and hose bib from the white trim to the cement wall below.

Cement has now been poured, sealing in the conduit placement:

Next step is replacement of the flagstones in this area, parging the cement walls, and installing the outlet and hose bib.

 
2 Comments

Posted by on August 5, 2012 in Exterior


The Back Gets a Trim (and Some Siding)

Now that the windows were in, we could move forward with cladding the exterior in the back (nothing’s being changed in the front of the house).

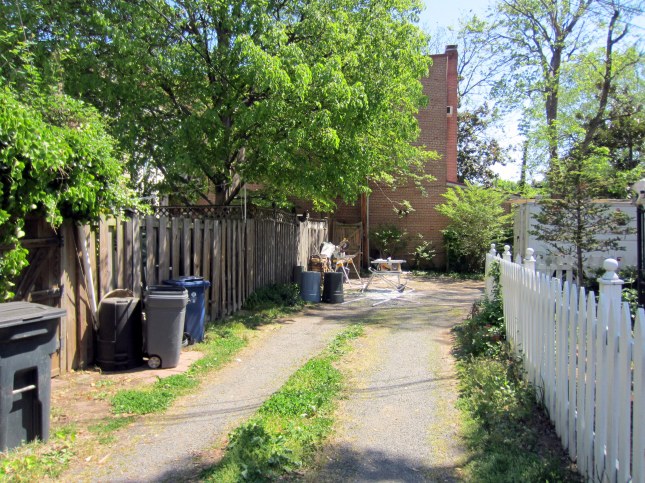
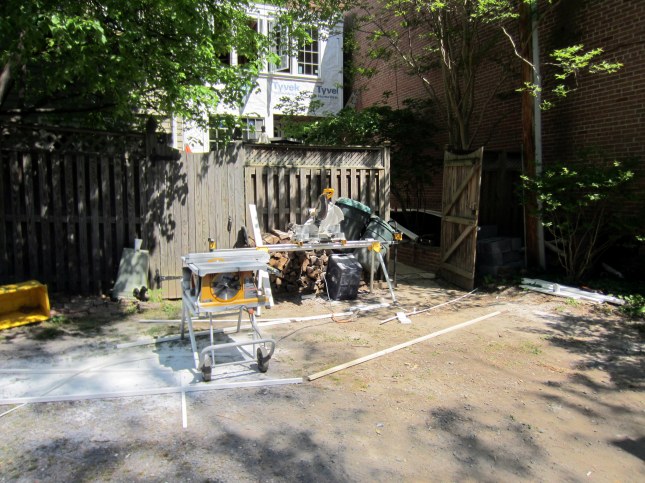
The guys set up shop for cutting trim and siding out in the alley:

For the next few days, the back of the house would be clad first in Azek trim, then with HardiePlank siding. Azek trim looks like white wood, but it’s actually PVC, so it’s pretty much bombproof, in terms of resisting the elements. HardiePlank clapboard siding is a mix of concrete and wood, so we should have a stable shell on the house for a few decades.

The first thing to be installed (after the rockin’ coped trim in the corner) was Azek trim on the bottom of the house. Dave recommended going with a wide, beefy look, and we agreed (it turned out great, as you’ll see). Right above the trim is a thin, metal drip edge, above which will be installed the clapboard siding.

One of the other design issues was how to address the narrow space between the window trim and the corner trim at the eastern edge of the new bumpout. Dave; Harry Braswell, the GC owner; and others consider the situation, below.

The solution we arrived at was to fill the narrow space between window trim and corner trim with a recessed piece of Azek at the same profile as the siding to come. However, there was some confusion in execution, as seen here, which subsequently was corrected.

An update appears below.

Quite a bit more progress has been made at the time of this shot. Siding has now been installed on most of the back of the house. It’s pretty much the color that it will be painted, even though it’s just primed at this point. The trim has not yet been installed between the window and corner, though.

The end result turned out great. Although still not painted at this stage, the clad back of the house, with the bumpout and overhang over the kitchen door, worked out great. The pillar to the right also has been completely trimmed out, and the base of the pillar fits perfectly on the step. Finally, the other element to be seen is the vent for the new range, which bursts out of the left side of the house like an unwelcome carbuncle, but we need to address both function and form . . .

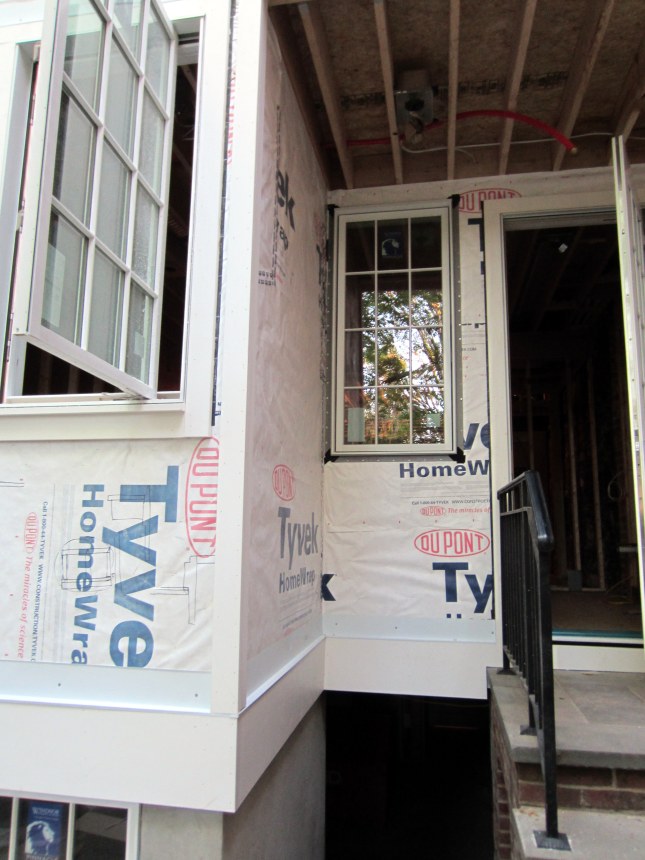
The only thing missing at this point is siding in the area under the overhang. The window to the left of the door in that area was supposed to be hinged left (so it opened away from the door and so the opened window would be positioned next to the edge of the house, rather than in the middle of this space), but the order was incorrect. So, we’re waiting for the replacement with the correct-sided hinge before this area gets completed.

 
4 Comments

Posted by on May 5, 2012 in Exterior


Windows to the World

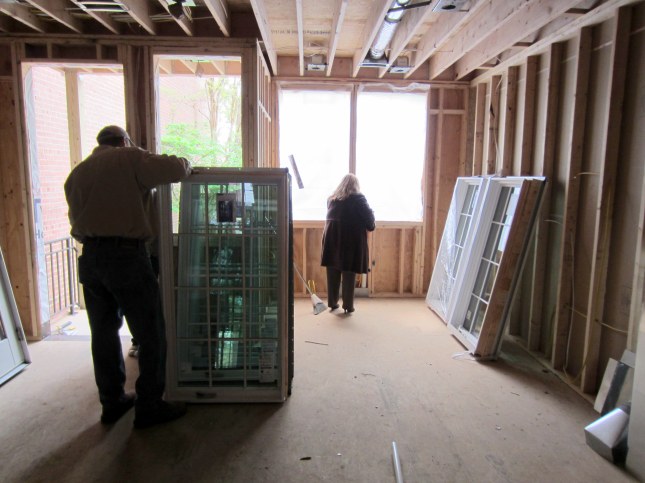
In mid-April, the windows and kitchen door arrived, and began to be installed. The windows all are casement, and the upstairs units (kitchen and master bedroom) are left- and right-hinged, while the basement pair are awning style – they’re hinged on the top. Here they are as they were initially placed.

The basement awning windows from inside. Also visible in the picture are the three, chemically stripped radiators that we salvaged from the house. More on those in a future hydronics post.

The placement of the two windows in the kitchen proper (there’s also another, narrower window at the rear of the house, but that isn’t actually in the kitchen) was critical, and the focus of attention by multiple parties. The windows had to be placed so that the faucet–centered on the sink–would also be centered between the windows. The kitchen windows also had to line up precisely with the two, easternmost, identically sized windows in the master bedroom.

Here, our kitchen designer, Tricia; our foreman, Dave; and our architect, Natalie, check out and measure the newly arrived units.

Tricia moves on to the kitchen area where the windows will be installed to confirm measurements.

All things in life offer opportunities for competition, and checking measurements in the kitchen is no exception. Here, we have: The Duel of the Tape Measures!

I think everyone just wants to have their own measurements, and not rely on numbers reported by others. They’re actually measuring the partial bay on the east side of the ceiling to determine if a big vent line for our new, 36″ range can fit here (luckily, it can).

As seen in the first floor design goals post (https://wolfestreetproject.com/2012/03/31/transforming-the-first-floor-goals-and-design-plans/), we originally were going to install a standard-height door at the rear of the house, with a transom window over it. However, we like the look and function of a taller door better, and so modified this design late last year. Here’s the door before installation.

At this point, the master bedroom windows have been roughed-in, but not fully installed; shims are still in place on the bottom.

A view of the installed door and windows on the first floor:

And fully installed windows in the master bedroom (the drawing to the right is the architect’s wall section the builders were using to erect the walls):

Wall section drawing:

A view of the new windows from the exterior:

Between window arrival and window installation, spring has come to the trees in the back alley:

A view of the new landing area at the back of the house. At this stage, trim has begun to be added to the pillar and elsewhere – full coverage of the trim and siding that follows is the subject of the next post.

 
Leave a comment

Posted by on May 5, 2012 in Exterior


How to Cope with Adjoining Houses

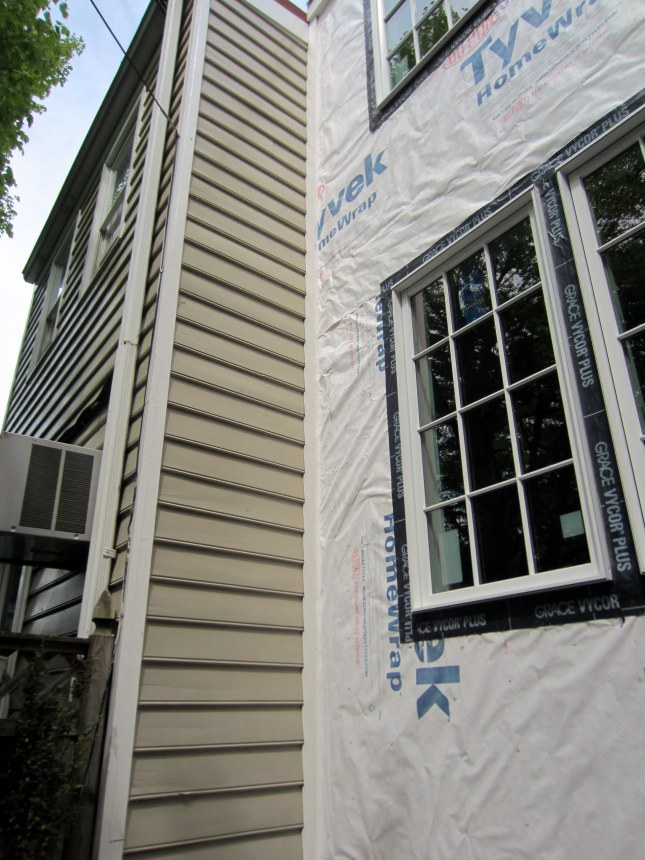
As pictured in a previous post  (https://wolfestreetproject.com/2012/04/13/the-roof-the-roof-the-roof-is-on-fire/), the bumpout in the back abuts our neighbor’s house and we need to install trim at their intersection. The challenge is that our neighbor has wood clapboard siding, and we don’t want to disturb it during our renovation.

The approach, which we discussed with our neighbor before we moved forward, is to cope the trim to match the clapboard pattern, so it snugs into place. Even better, the guys used a mammoth length of Azek trim long enough to cover the entire length of the abutment, which required no miss-steps with the coping, and which would provide a seamless edge when it was installed.

Here’s how the coping looked before it was installed:

These cuts just go on and on.

And here’s a few pictures of the end result:

That’s one long mother, and it fits great, too.

 
Leave a comment

Posted by on April 15, 2012 in Exterior


Shedding Some Light on the Subject

The renovation plan originally included installing just one new skylight over the new master bathroom. However this changed twice during demolition, and we ended up installing three new skylights:

  • First, the original gable-style skylight over the upstairs bathroom (now the guest bath) was beyond repair, so this needed a new unit
  • Then, there was the epiphany that removal of the linen closet in the hallway over the stairs could introduce more light to the first floor, and we amplified the effect by replacing the existing skylight with a larger one to fill this space

Soon after the roof was replaced (https://wolfestreetproject.com/2012/04/13/the-roof-the-roof-the-roof-is-on-fire/), the skylights were installed. There were several stages before the installation and completion of these activities. First, the entirely new, originally planned skylight in the new master bathroom needed to be framed out and cut through the roof deck. Here’s how it looked after altering the rafters to accommodate framing (you can see the edge of the old bathroom skylight next door, as well):

The guest bathroom gable-style skylight has been removed, but the framing does not need to be changed:

Over the stairwell, the old skylight and drywall shaft that had previously been left untouched to watch over the destruction below (there’s a good shot of it about halfway through this post: https://wolfestreetproject.com/2012/02/28/the-pinnacle-of-destruction-its-all-uphill-from-here/) have been removed, and the area framed in preparation for the new, longer skylight:

The membrane roof was installed before the new skylights arrived, and they just membraned over everything (which is as it should be . . .).

Here’s the guest room skylight. At this stage, trim boards have been added to the framed shaft, as well. Light the old gable skylight, which had louvers on the sides to facilitate ventilation, the replacement skylight here will open. Since the door to this room will open onto the little upstairs hallway that’s exposed to the stairwell air flow, this will help overall house ventilation.

Skylight packaging detritus adorns the back patio after the skylights arrive.

After installation, the results on light flowing into the house were immediate:

Looking west into the two upstairs bathrooms:

The master bath space looks much better with a hole in the ceiling.

Looking north through the stairwell skylight, to the willow-oak in front of the house:

 
1 Comment

Posted by on April 15, 2012 in Exterior


The Roof, the Roof, the Roof is on Fire . . .

During installation of the house infrastructure inside, activities continued on the exterior. One of these activities was replacement of the roof. Prior to renovation, our house had a standing-seam tin roof. Although a standing seam roof is great, the materials coating ours roof were decidedly not.

The roof originally had been coated with traditional, red paint appropriate for metal roofs. However, at some point before we acquired the place, an owner began to coat the thing with what those in the roofing trade call “alumination.” (Based on the appearance over time, we suspect that this is an etymological hybrid of the words “aluminum” and “abomination” . . .)

Below are some pictures of the roof at different periods during the last decade. Here’s a shot of “alumination” at its best, shortly after an application of the sticky stuff:

Nice, eh? In addition to the freshly coated standing-seam roof, you can also get a gander at the kick-ass chicken wire-embedded glass on top of our old gable-style skylight. We’re still in mourning over its loss. RIP, gable guy.

The photo above shows our old roof at its best: on school picture day, with all its blemishes covered up and cowlicks matted down. But it had another side, this roof of ours. Over time, it would skip school, start hanging out with the wrong crowd, get hooked on meth, and begin a steady, progressive decline toward utter decrepitude.

Below is a shot of the roof condition that would emerge 3 – 5 years after every application of the wondrous “alumination,” the unguent of the roofing universe. (To be clear, this crap was just a tar-based paint with aluminum flakes that would rise to the surface as it dried to provide a reflective quality.)

The old stairwell skylight is at left. The access panel to the roof that used to be accessible through the sleeping porch (and had been drywalled over inside only to be revealed during demolition) (https://wolfestreetproject.com/2012/02/12/original-sleeping-porch-exposed/) is at the right rear.

The old bathroom skylight at its crapulent worst makes an appearance in the picture below (I don’t mean to speak ill of the dead, since we really loved this gable-style skylight from the inside, but just check out the exterior). At this point, the prison bus-style, chicken-wire-embedded-glass is sliding off the gable structure like melting snow on a pitched roof. We actually used to go up there occassionally just to shove that freakin’ piece of glass back into place to keep it from falling off completely. There was no clear way to secure it since the glazing was deteriorating, so it would just slide down again and this became an occassional, bizzare household maintenance item.

Household chores for some people entail activities like cutting the grass and trimming hedges. Us? We periodically head up to the roof to manhandle crazy chicken wire glass panels on top of our roof to prevent gaping holes from forming. Yeah – seems normal.

The roof coating would flake off over time, requiring another coat every 3 – 5 years. And, once you start down the path of using this coating, there’s no going back to normal tin roof paint, so were were stuck in this cycle. We could always tell when the roof needed another coating because the flakes would begin to appear in ones and twos in the backyard after it rained, increasingly accumulate, and finally achieve critical mass in little piles. Here’s a picture from several years ago (prior to the back yard hardscaping project), where you can see the this collection of the-roof-needs-a-new-coating indicator flakes in the center of the photo at the edge of the brick patio:

For what it’s worth, here’s a shot of the other houses in our block, which were all built at the same time and were all identical in 1925. Many have successfully pursued the sustainable roof paint route. You can see how things have evolved for each owner (the insides, of course, are more dramatic). Two original, gable-style skylights still remain.

Roof replacement was part of the renovation project for two reasons: one was to permanently eliminate the maintenance requirement associated with the roof coating; the other was to address the roofing need of the bumpout in the back. As part of the renovation, we’re installing a fully adhered membrane roof. In addition, the membrane is white, enhancing house cooling in the summer and reducing energy use.

The roofing sub arrives to remove the old roof and install a new one:

In addition to the roof, the old air compressor for the AC needs to go (which is actually a little annoying, inasmuch as it’s not too old – we replaced this in 2006). Such is life. Here’s a pic of it right as it was lowered from the roof while we were at the house for a site meeting:

By the end of the day, they had removed all of the old standing seam roof and filled a dumpster with the results, as well as other demo debris that had been accumulating. However, it was filled to overflow capacity, so additional conveyance was used:

A piece of the old roof:

Cram that baby full, boys!

In addition to the membrane roof, the sub also started to install the Azek trim boards on the top and side. What they do on the left is actually pretty cool, and will appear in a future post.

Here’s the new roof looking north. At this stage (this was taken a couple of weeks after the roof went up) the skylights have been installed, as well, which is the subject of the next post. You can see the copper lines from the air handler on the second floor, which penetrate the roof about half way up on the right to meet a to-be-installed compressor unit.

Here’s a closeup, per Sandy’s comment:

 
2 Comments

Posted by on April 13, 2012 in Exterior


The Window of Inopportunity

Living in the historic district of Old Town has its benefits, but it also has its hassles – namely some of the restrictions on exterior elements when you’re renovating a house. As quaint as they are, the original windows of our house are coming apart and are about as energy-efficient as wax paper, so we planned to replace these with new windows that are identical in style. Same with our front door. No such luck.

Although neighbors up the block in our row of houses successfully replaced their front-facade windows and door during a renovation a few years ago, since then, the city has now seen fit to prohibit such replacements for any house built before 1930. We unfortunately fall into this category. The reason for the restriction is to preserve the historic, rolled-glass windows on the street-facing facade of houses. The rolled-glass technique results in slightly uneven glass panes that are characteristic of older houses. Preserving these windows maintains the historic nature of the houses in Old Town, but presents a challenge to homeowners who put a premium on energy efficiency.

In support of the required windows rehabilitation effort, the windows on the main floor began to be removed in late March:

Inside the house became notably darker:

In addition to the windows themselves, we also have original storm windows that hang from nails over each window and fit inside the exterior window frame – these and the top and bottom of the windows themselves are stored temporarily, before being removed for off-site rehabilitation. Since the windows have the iron counterweights inside on either side of the window (you can see the pulleys at the top of each window), these will need to be reattached, so the guys will need to take down the closet framing blocking the left side of the left window at some point:

By the end of the month, the second-floor windows had been removed, as well, and our house was looking like it had been condemned as part of an urban renewal program – we keep thinking that we’ll drop by one day to find a community of hobos inside huddled around a trashcan fire.

The depressingly dark guest room, now devoid of natural light:

 
Leave a comment

Posted by on April 8, 2012 in Exterior